
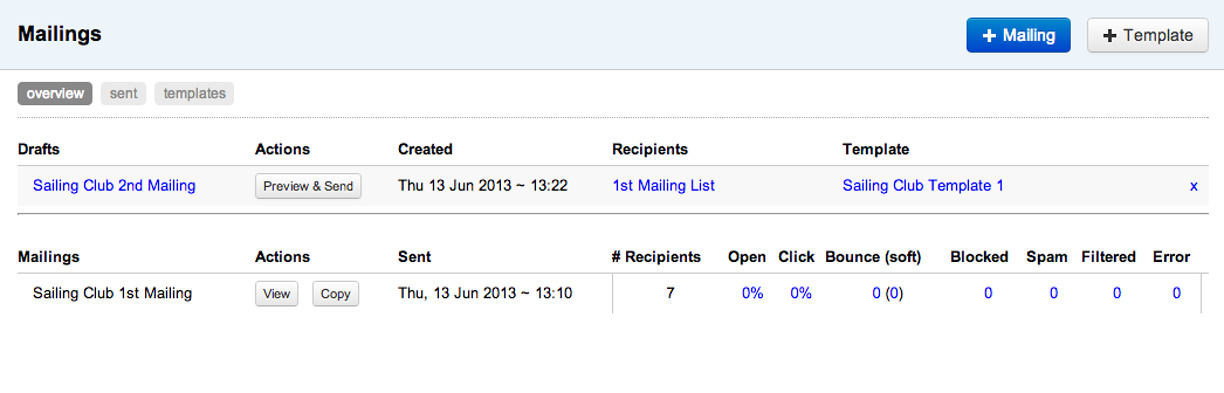
Create a new mailing
Before creating a new mailing, you need to create a template to be used, and have some contacts in a list to apply to the mailing.

Once a template has been created it can be used on any number of mailings.

Before you start to create your email decide the layout format you wish to use. Click here to see layout options and required image sizes. It is advisable to size any images or graphics to the required width beforehand. All images should be .jpg files @72dpi in RGB format.
How to create an email:
To start building your email select “Add Mailing” top right.

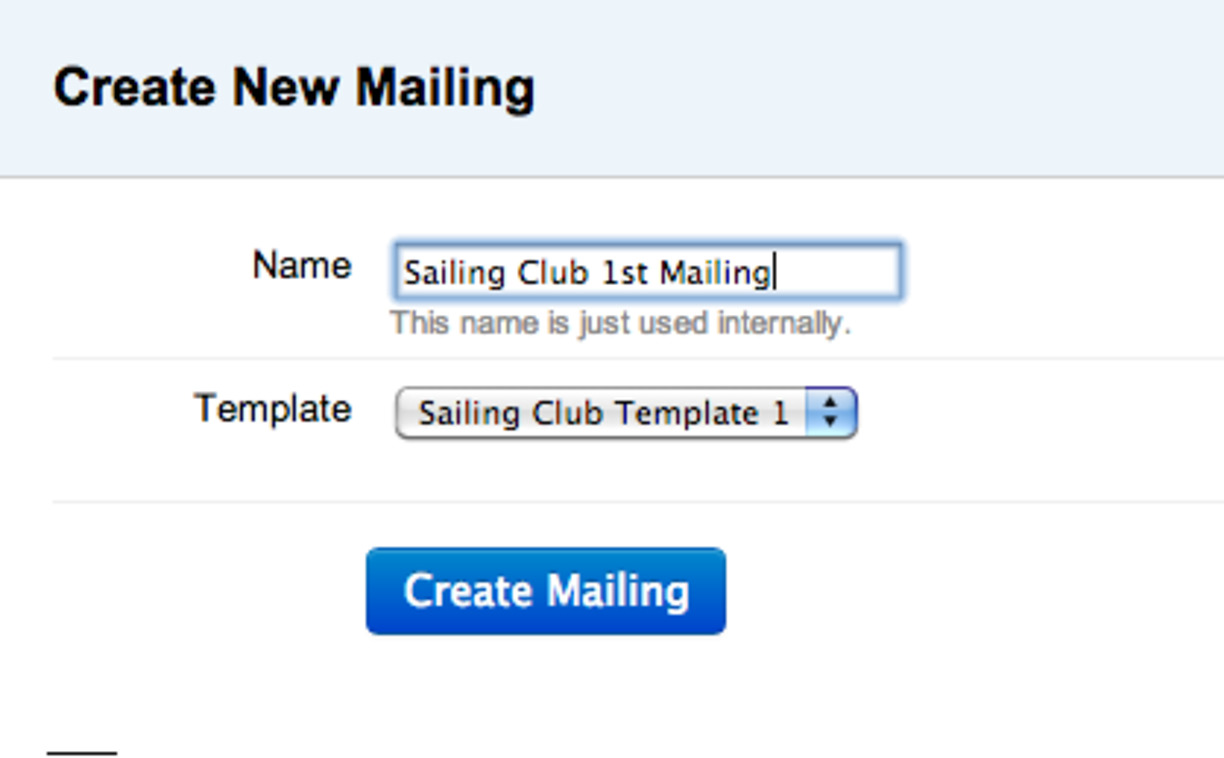
1. Type in the name of your email. This is for internal reference only.
2. Select the template you wish to use from the dropdown list.
3. Select 'create mailing'.

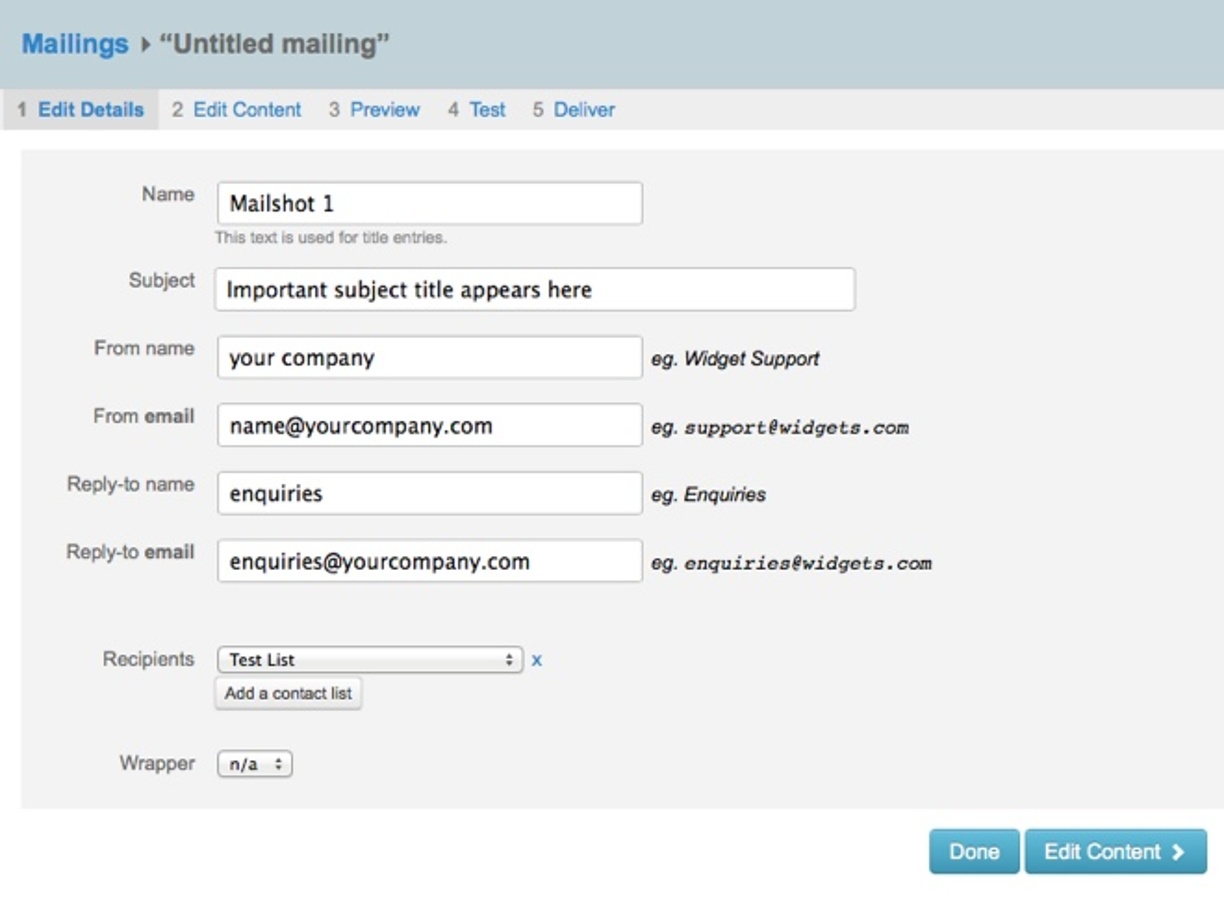
Edit details:
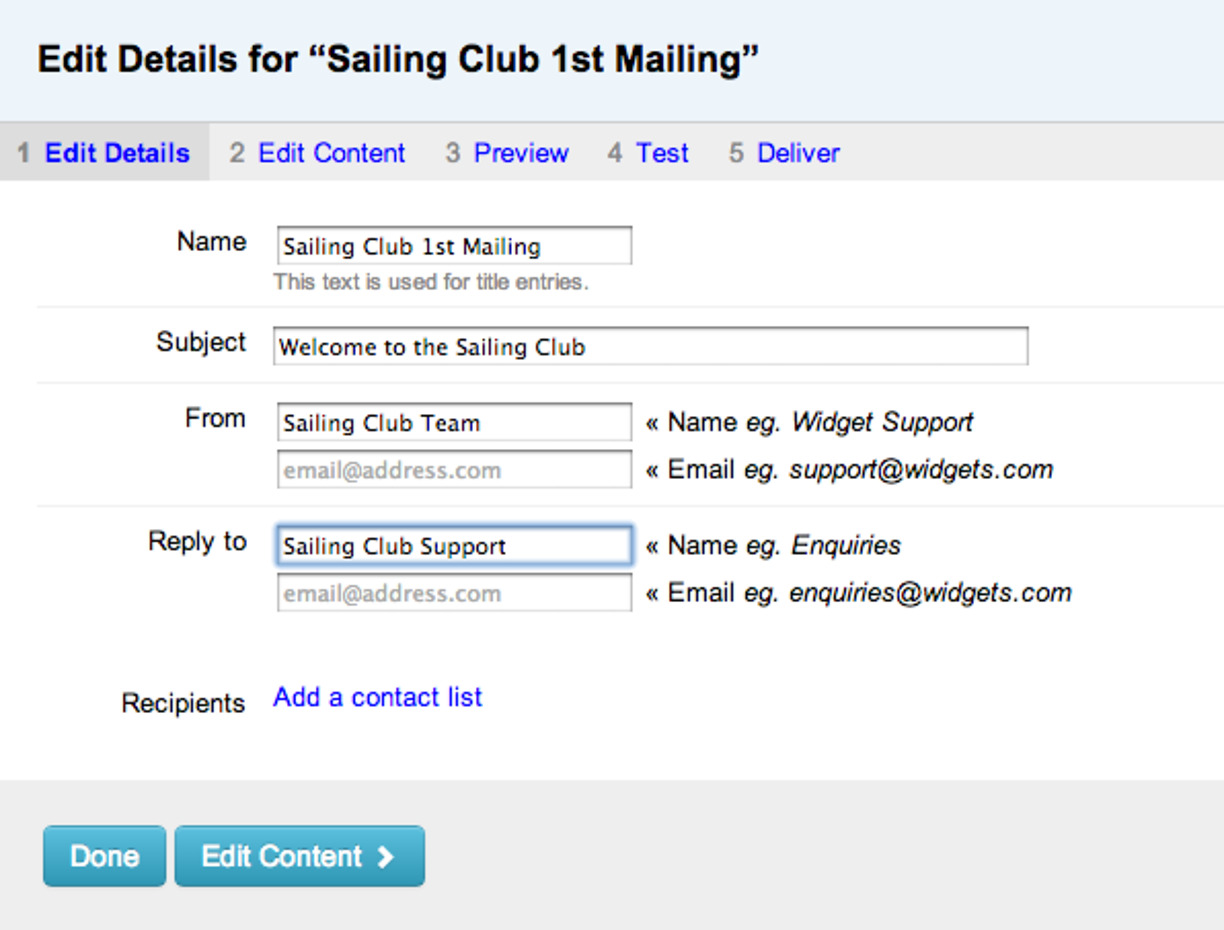
1.Name - type the name of your email. This is for internal reference only.
2. Subject - type the email subject. This is important as it appears as the email title for any recipient.
3. Preheader - use this to add text which will show in the email client but not in the actual email.
Instead of your customer seeing a default message, such as 'Problem viewing this email? Click here to unsubscribe', you can add your own teaser text to enhance your email appeal.

3. From name - type the name of the email sender.
4. From email - type the email address of the sender.
5. Reply-to name - type the reply-to name (this might be different to the sender name).
6. Reply-to email - type the reply-to email address (this might be different to the sender email).
7. Recipients - click 'add contact list'.
Click 'please select' to choose from your database of email contact addresses. You can add as many lists as you wish. Find out more about creating and organising your email contacts. (You can click 'done' at any stage to save your work and exit the file).

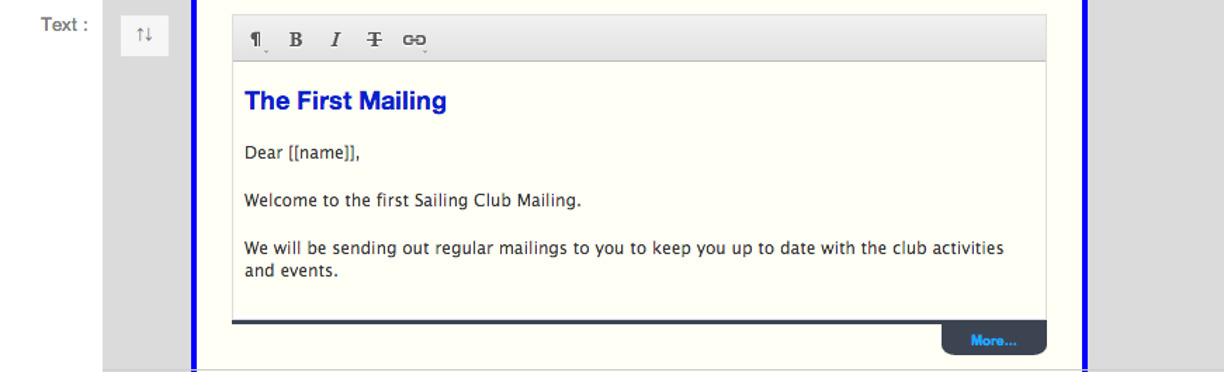
Edit content:
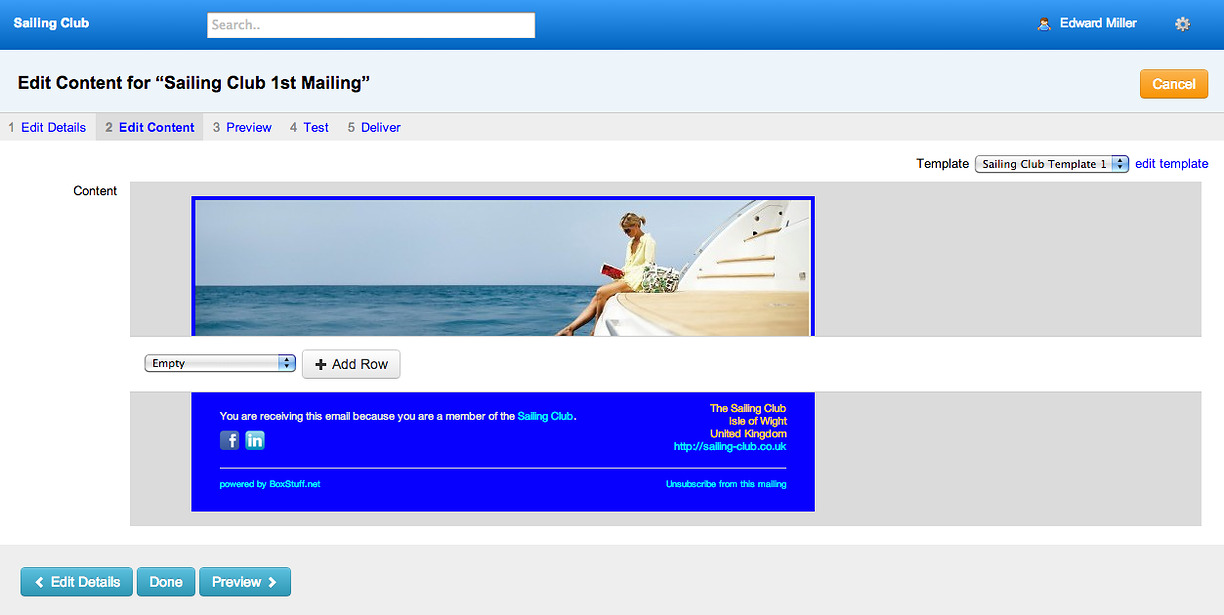
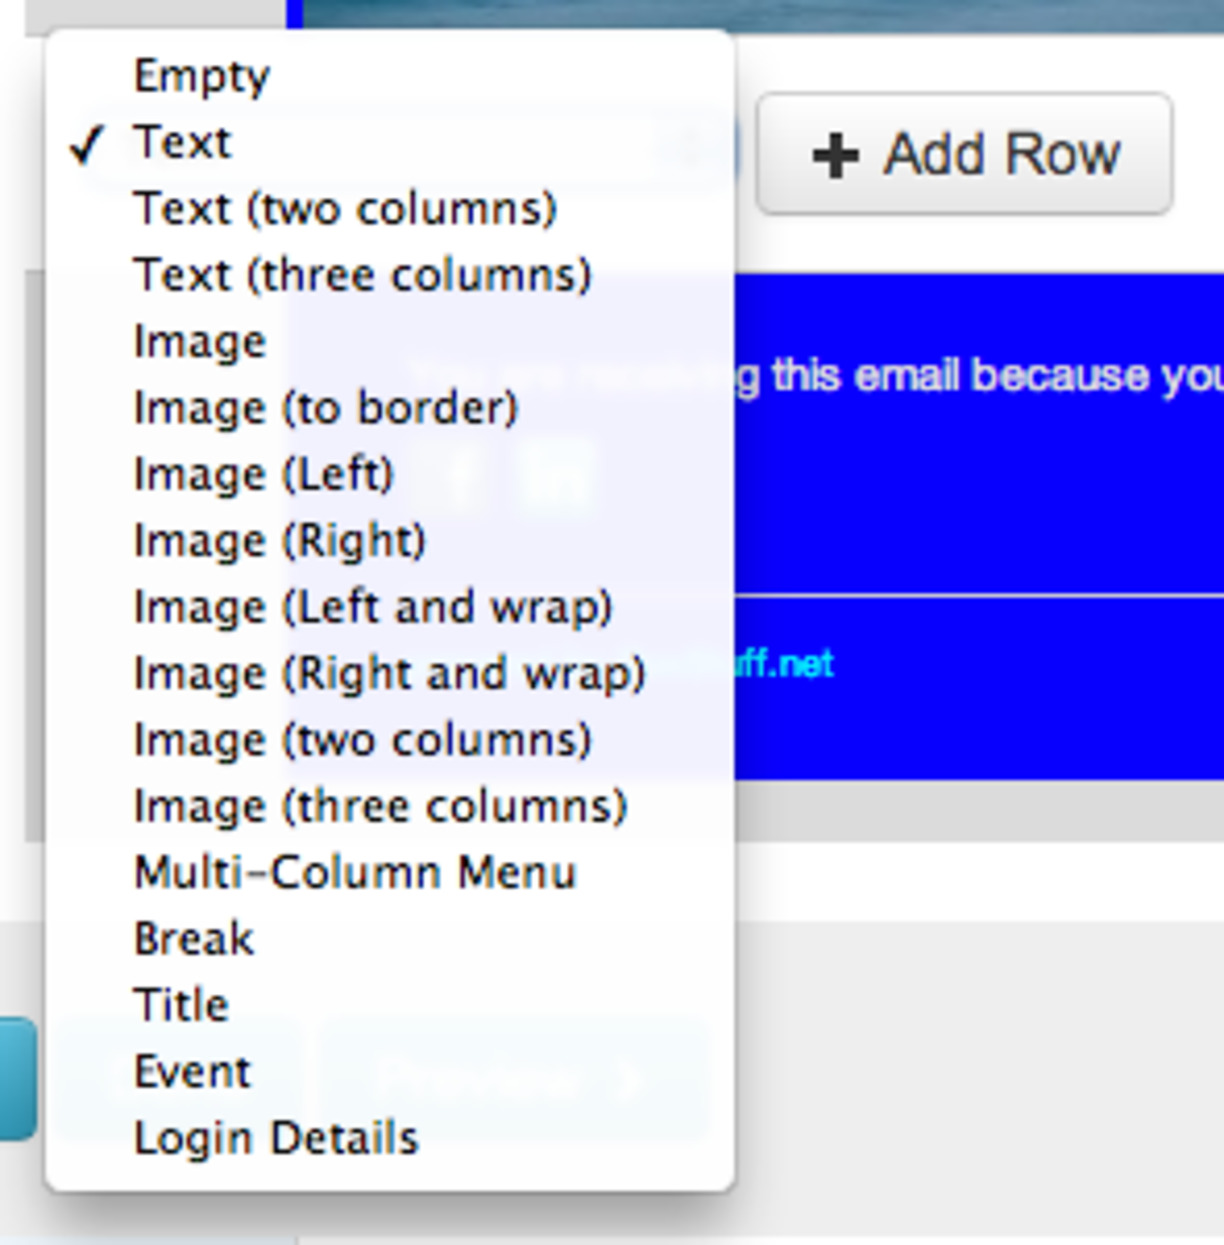
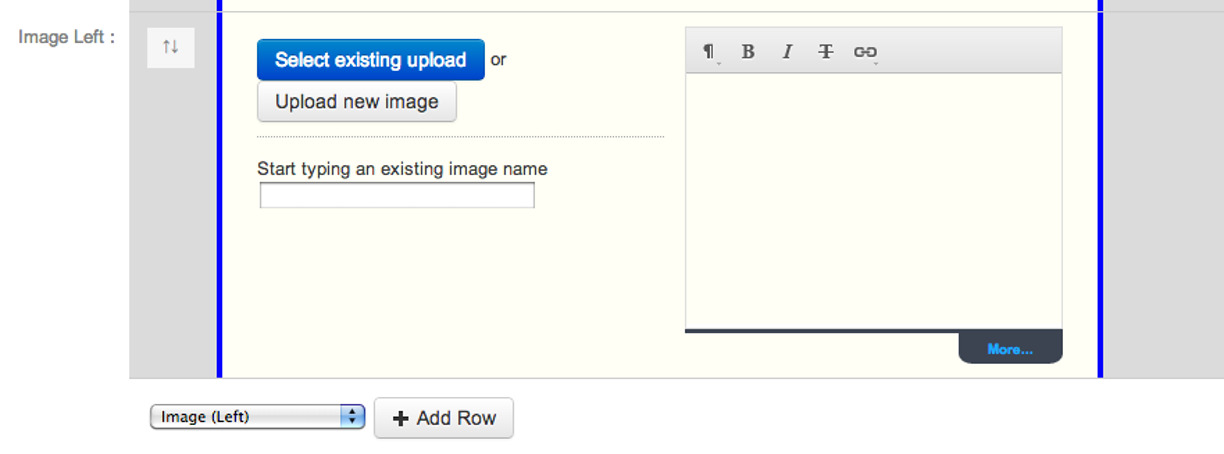
1. Add rows by selecting from the drop down list based on the desired format of your layout.
2. Build the email by adding rows until it is complete. (Text can be edited using the editor panel including creating links.)
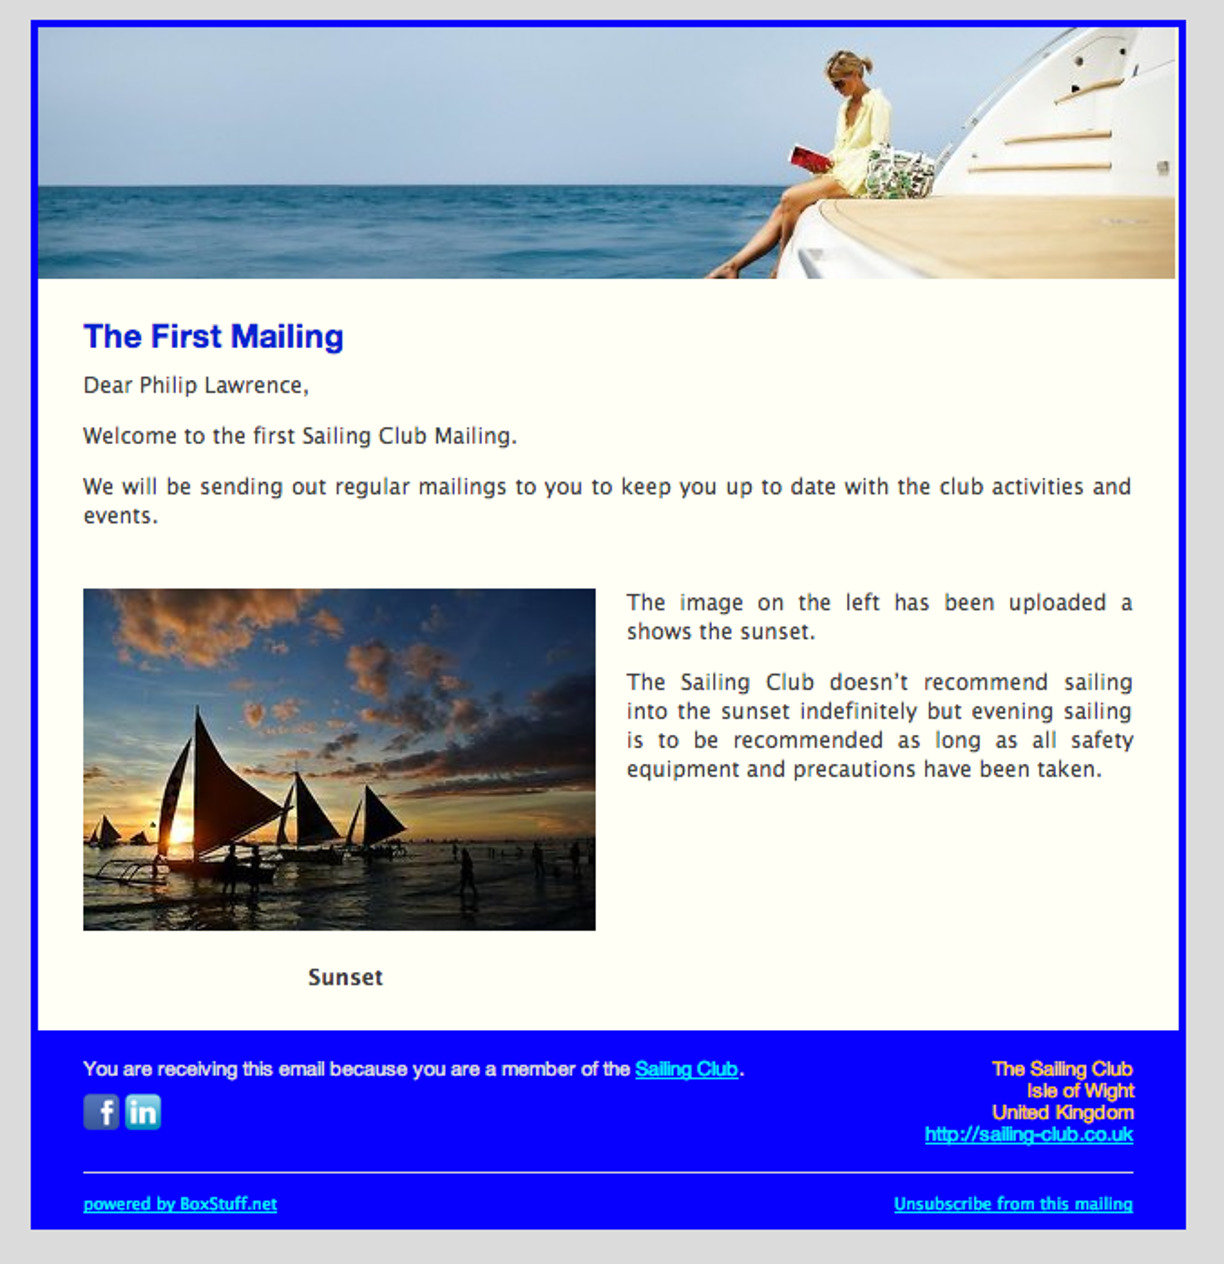
3. Adding an image - prepare the image to the correct width beforehand.
Type a description in the 'Title' box. Add a URL link if required. Click 'choose file' and then 'upload now'.

Preview:
1. When your layout is complete click 'preview' to see the finished email layout.
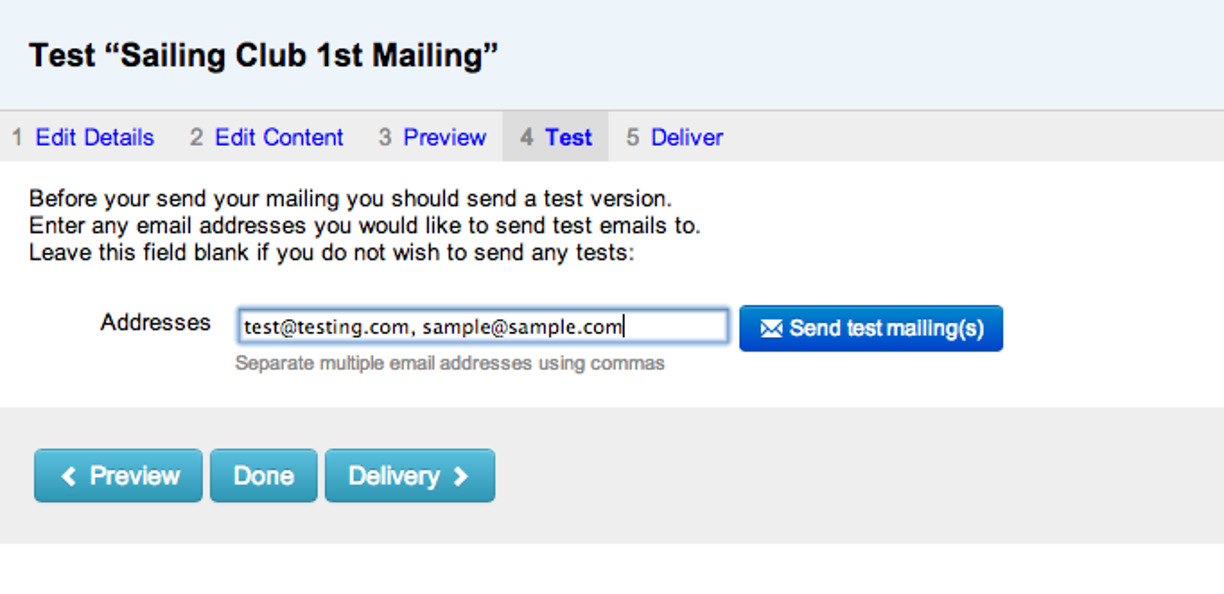
Test:
1. Send a test version to one or more email addresses to ensure everything is correct before mass mailing.

Deliver:
1. Send the final version to all the selected email addresses. Once your email has been sent you can see who has opened it by checking the 'latest activity' menu option.


Last updated 13:15 on 26 March 2026


