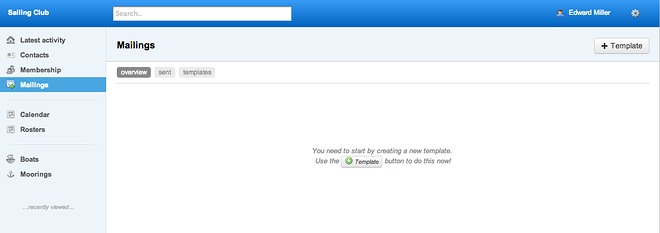
Create a new template
To send an email you first need to create a template. Select 'Mailings' on the left hand menu.

It's a good idea to familiarise yourself with the layout options before creating your email. The email content is built as a series of rows. The rows can be just text, just photos or a combination of text and photos. Click here to see layout options and required image sizes.
Your template frames the email message and can have a coloured border and a white or coloured background. The template has a header which can simply be text or it can be an image. The template also has a footer which contains contact details, permissions, social media links etc.
How to build a template
Select '+ Template' in the top right hand corner.

Name: give your template a name for your own reference.
General:
1. Create a coloured background by selecting your preference.
2. Add a coloured border in the same way. You can alter the line thickness.
3. Choose the font style and size for the main email text.

Header:
1. You can use either an image or just text for the header.
2. If you prefer to use an image click the box, select 'choose file' and upload your image.
This should be 630px wide and saved as a .jpg file at 72dpi in RGB format.

3. If you prefer to use just text, type the words and select colour, alignment, font and size.
You can add a coloured background by choosing the colour in the 'background colour' box.

Body:
1. Select the background colour for the body of your email (this can just be white).
2. Select the font colour for titles.
3. Select the font colour for the main text of your email.
4. Select the font colour to identify links in your text.

Footer:
1. Select the background colour (this can just be white).
2. Select the font colour for your footer text.
3. Select the font colour to show links in your footer text.
4. Select the font colour for your address information.

Footer content:
1. Type permissions text.
2. Type address and contact details. (You can add links to your email and website addresses.)
3. Click on relevant social media and type in addresses.
4. To finish click on 'create mailing template'. Elements of the template layout can be changed at any time.


Last updated 17:07 on 8 September 2025


